Tutorial (for Windows)
Here is a tutorial on the basics of how to use Minecrafter. Although done in Windows, this can be applied on any platform which Minecrafter supports.
Required Mods
- Risugami’s Mod Loader & Arrows Mod http://www.minecraftforum.net/viewtopic.php?f=25&t=47148
- Frenden’s Texture Pack http://www.minecraftforum.net/viewtopic.php?f=25&t=46707
- Nurio’s Texture Pack http://www.minecraftforum.net/viewtopic.php?f=25&t=38671
Learning Objectives
- Learn how to create a mod package
- Learn about mod priority and how that affects merging mods
- Learn how to easily merge blocks from different images into one
- Resolving mod conflicts
Creating the Mod Package
Firstly what we want to do is create a mod package which will contain all our mods and define rules on how to merge these mods together. On Minecrafter’s startup, press the “New Package” button to load up the Mod Package Editor
First thing we want to do is specify a mod package name. Set it to anything you want.
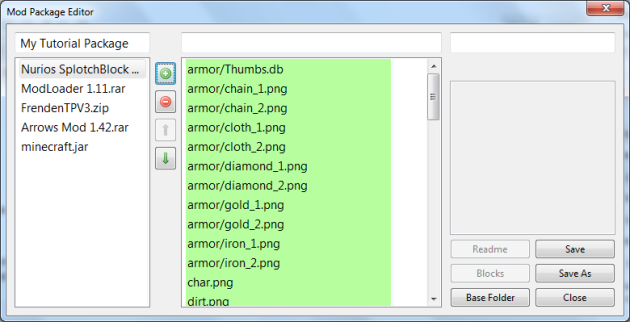
Now, lets add our mods into our mod package by pressing the add mod button (![]() ) and selecting “Add File”
) and selecting “Add File”
From here we can add the mods individually, or select multiple mods. Add all 4 mods into the mod package in any order.
Lets arrange the mods into order, as mod priority is important in the merging process. In this tutorial, Frenden’s texture pack will take highest priority, while we take individual elements from Nurios. Arrange the mods by using the up/down arrows like so:
Fix pathing issues
Sometimes our archives are packaged in a way that doesn’t properly translate to minecraft.jar. As you can see from Frenden’s mod, it has a folder called FrendenTPV3 which is not mapping properly. For example, terrain.png should overwrite the Nurio’s terrain.png, but from the screenshots, we see this is not the case.
 terrain.png should be highlighted as red, meaning inactive
To fix these problems, we need to set a base folder. Select the offending mod, and press the base folder button. A window should popup with a list of folders contained in the archive. Since all the content starts from FrendenTPV3 lets select this folder.
As you can see, now all the files have changed, removing the base folder and starting from there. If we go back to minecraft.jar, we can see that its now properly overwritten.
Resolving mod conflicts
If you don’t already know, Risugami’s arrows mod adds custom arrows with different properties. As well as that, each arrow has it’s own graphic, as show here:
Now, because we have other texture mods above it (or potentially below it if you arrange it that way), the gui/items.png file will be replaced. By using the block selector, we can select blocks from a lower priority mod which will be added into the higher priority mod. Because there are blocks we want, it’s easier to have the arrows mod as lower priority (if it were the other way around, we would have to select a LOT more blocks).
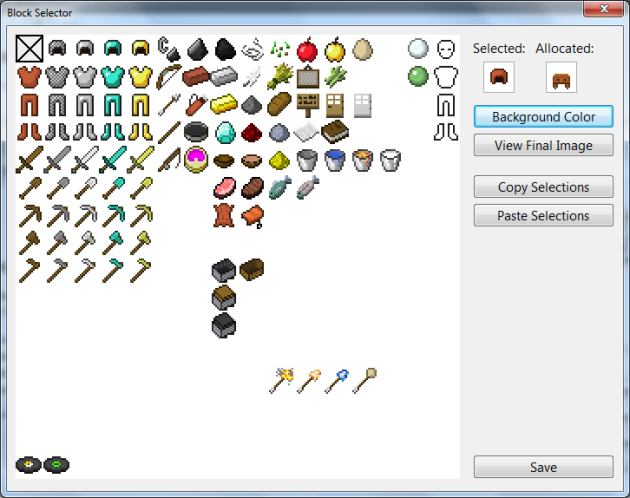
Select the arrows mod from the mods list box, and press the blocks button. On the drop down menu, select gui/items.png. This will open the block selector.
Now double click on all 4 arrows, and they should be highlighted by a green box, illustrating their priority.
To see the final image, press “View final image” to see the final image (which will be the exact image that will be loaded into Minecraft).
As you can see, it perfectly merged Frenden’s items with the arrows.
That pretty much sums up the mod conflicts!
Texture Pack Personalization
Because we added 2 texture packs, lets mix and match different elements from terrain.png to suit our style. For example, lets say I don’t like the look of the ores from Frenden’s texture pack. Select Nurio’s texture pack and click the blocks button and select terrain.png. Just like the previous section, double click on the blocks you want to keep.
If you’re doing some fairly complex mix and matching, you can see your previous selections depending on which mod you’ve currently selected. If I switch to Freden’s texture pack, I can see my selection from Nurios highlighted as red boxes.
Clicking on an “allocated” blocks shows an image preview of the selected and allocated block. If I wanted, I could override the selection (by double clicking), but for this tutorial, lets leave it at that.
Finialize mod package
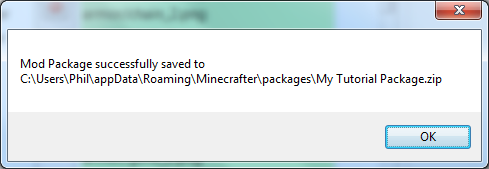
Our mod package is complete, so lets save it. Press the save button and a file dialog will appear. Press save to save it in the default location.
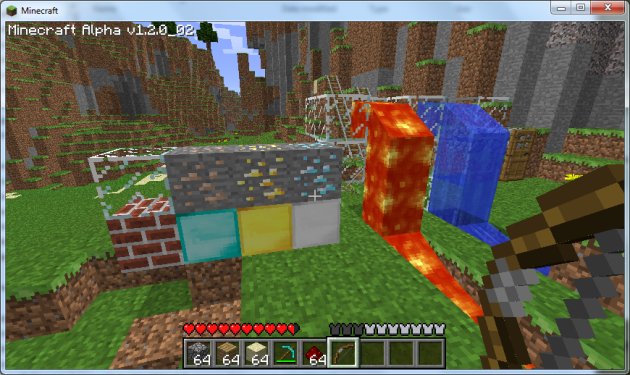
Close the Mod Package Editor and your newly created mod package should be visible in the main form. Press “Launch Minecraft” to launch Minecraft. Load up your map and see the changes!


You sir, are one level below God.
I have been having this issue with anything I do with modloader.
I downloaded your 64 bit version as I have a 64 bit OS and it did not run so I downloaded your 32 bit one it runs yay. Anywho I followed this tutorial but only used the arrow mod and modloader and the same thing happens. When I try to run minecraft the screen is just black (after the log in screen) it never gets to the base menu.
Help?!
Hmm. I assume you have Mac OS 10.5?
Did you delete the Meta-Inc (or something like that) file? cos’ you have to.
wth i do everything you say and when i launch minecraft i get a black screen help!!!! please
The HD fix is incompatible with the latest Minecraft update. Disable it via the options menu.
when i try to launch the mod after it is saved it says that it cannot backup minecraft.jar.
please help
Was Minecraft running before launching?
no i only had google chrome and minecrafter open
Weird. Wait for the next version and hopefully that will solve the problem. How about restarting Minecrafter?
well i actually made 2 other ones which only contained minecraft.jar and they didn’t work either
Im having the same problem, ive been trying to get any mods to work and i end up finding minecrafter, and its still not working for me…
so how do you merge 2 png together??????
i follow exactly the tutorial but i only get a black screen after the log in screen 😦
Did you download the latest versions of the mods compatible with Minecraft beta 1.0.2?
oh yeah that was the problem…
thanks!!!! 🙂
when i try to launch minecraft with the button in minecrafter it cant find my package, i checked that it had saved and it had but it cant find it??
You have to save it in the folder specified when saving. You cannot save anywhere else.
Help! Everytime I press lanch minecraft minecraft doesn’t open. PLEASE HELP ME!
Did you select the correct Minecraft executable when the dialog box popped up when you pressed “Launch Minecraft”?
Do you mean the temporary etc.
well if it is dat then i picked temporary and it didnt work.
I can’t get it to work at all, I tried getting the arrows only and it didn’t work.
Okay.. so I did all this, but once I save my mod package I can’t Launch it without using Quick Mod Launch.. and when I do the game launches fine, but NONE of the mods work.
Did I do something horribly wrong somehow?
What happens when you launch temporary?
Nothing. As I said. s:
It just loads like normal. With nothing modified.
That means you haven’t setup your mod package properly. Upload a screenshot of your mod package loaded in the mod package editor with the offending mod selected so I can see the file list.
I seem to have a problem im merging misa’s and albion mods and i try to do temp run to see if it works and i get a problem with the art/kz.png i have made sure only one is selected and others are not but no matter what i try it does not work???
??????????? well ummm i feel stupid but for some reason i left it for a few hrs tryed it again (with no change) so i could see the error msg and it worked? no clue wtf but it worked.
When I use the “blocks” drop down in the arrows mod, both options are greeted out and I can’t use them. Also I installed the “John Smith” texture pack this way and all the text in the game is messed up and written over itself so that only parts of it are readable. The arrows mod works and I can run minecraft but I can’t add the textures to the pack so they have no icon in game. Any help?
it closes every time i click new.
I am trying the use modloader and too many items and they wont work together. After I log-in to minecraft it black screens and i was wondering how to fix this?
WTF i dont undersand